If you’ve decided you want to monetize your skills and sell courses online, the next step is to design the perfect online course curriculum.
There is, in fact, a science to online learning.
And your job as an online coach is to help people get the most out of their experience with you.
That means you need to learn a little about instructional design to create the ideal learning experience for your students!
And, we’re here to help you do it. In this article we’re going to share 7 steps that will help you learn how to design online courses effectively..
We’ll show you how to:
- Identify your learners.
- Set clear learning goals.
- Outline your course structure and syllabus.
- Develop your cornerstone content.
- Upload and organize courses.
- Add extra learning resources.
- Get students involved with collaborative features.
Your students will thank you for it – and your course will thrive because of it.
Let’s go!
Why Great Online Course Design Matters
Want to get right to creating your course? Skip ahead!
The best online courses are transformational.
Your students crave a sense of accomplishment. They want to emerge from your course feeling like a new and improved version of themselves.
This learning environment should change their lives for the better.
As an instructor, the best way to help them achieve success is by designing your course around a learning method called “deliberate practice.”
Deliberate practice is a purpose-driven system that helps students…
- focus on the task at hand
- practice new skills
- make steady improvements
…as they work towards a specific goal.
Deliberate practice is not a vague overall improvement – it involves well-defined, specific goals and improving an aspect of your performance.
Anders Ericsson, How to Be Great at Anything
To support this, your course structure must give students the opportunity to do 3 things:
1. Think Critically
Deliberate practice helps people make noticeable improvements over time.
In the context of an online course, this means presenting people with new information and helping them apply it to their own lives.
You want them to understand not only the nuts and bolts of this new skill, but also how to keep improving at it after they’re done with your course.
2. Create Confidently
Today’s learners require more outlets for creativity. We’re best able to absorb new knowledge when we get the chance to create something with it.
Online students prefer active, rather than passive learning environments, and, because they participate in a highly interactive world, they expect the same in their classes.
Student Satisfaction with Online Learning: Is It a Psychological Contract?
Simply put: explain your message, but also create opportunities for practice.
This helps students get hands-on, practical learning experience, and also helps them see their own progress.
3. Communicate With Peers
We absorb knowledge not only from teachers, but through interaction with groups we’re a part of.
According to K. Swan’s research into online learning environments, “interaction with instructors and active discussion among course participants significantly increased students’ satisfaction and perceived learning.”
Making your students part of an active learning community can create a sense of purpose and increase motivation.
It even gives them the opportunity to support (and be supported by) fellow students.
A great online education uses these key elements – and you’ll find that they tend to come together naturally when you follow the 7 steps below to create the perfect course.
7 Steps to Creating the Perfect Online Course
We want to help you put together a course that creates successful students and satisfied customers.
Here are the 7 steps to take in order to design the most effective learning path for your students.
Let’s go!
1. Identify Your Students And What They Need
You need to know who your students are.
Think about why they want to learn, what their learning objectives are, their demographic, and how you can best communicate your area of expertise to them.
Here are some questions to consider:
- Does your course require preexisting knowledge or are students learning from scratch?
- How many students will be in your classes?
- What is your level of involvement? (Are you charging more because you plan on being involved in the community? Or is it a more independent learning path?)
- What is the age of the typical student in your course?
- Where and how will they be watching your online teaching?
By focusing on your students’ wants and needs, you can start to narrow down more effective ways to teach them.
2. Set Clear Learning Goals
You want to create a results-oriented lesson plan with clear learning outcomes.
The main reason students sign up for your course is because they want you to help them solve a problem. They’re looking to:
- Develop their skills.
- Learn new things.
- Solve problems.
- Address their pain points.
They want to use the tools you’ve given them to become better versions of themselves.
This is all part of the “transformational” concept we talked about at the start of this guide. Each time you help a student do this, they get a little closer to being a different person.
This means that each…
- video
- module
- course
…needs to have its own clearly defined learning goals and key takeaways. It should be easy to understand what your students can do (or have learned) by the end of it.
A great example of this is how GUE.tv, a learning platform focused on diving skills and training, approaches their course content.
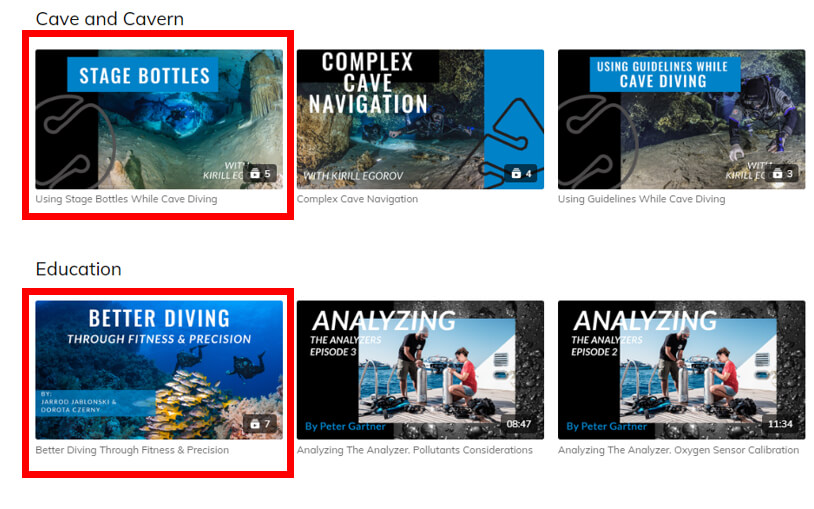
You can see that each of the highlighted mini-courses and modules has a clear and easy to understand takeaway. This can easily be summarised in a one sentence:
- Be able to effectively use stage bottles during cave dives.
- Understand how fitness and precision can improve the diving experience.
You want to address a clear and specific goal like this in your own course content, too.
To do this, you need to pose this question to yourself at the end of the course, module, or video: what will your students be able to do or understand that they couldn’t before?
Giving students that vision of success is a serious motivator!

Start your 14-day free trial today!
3. Outline Your Course Structure & Syllabus
The instructional design process starts with a clear outline.
You should create a clear outline that includes all of the video content you’ll need to create for your online course and the individual learning goals they will address.
Here’s a tip:
To make sure the learning goals you identified in the last step are being met, it helps to start from the end and work backward!
With the final learning goal as your starting point, work backwards and create a linear lesson path that leads back to the beginning of your course.
A great way to look at this structure is to follow this 3-step formula:
- Tell: set expectations and learning goals
- Teach: get into the meat of the subject
- Recap: go through what’s been learned
You can use this at each level of your course – for videos, modules, and overall course structure – but we’re going to look at this at a more zoomed out level in the steps below.
1. Tell: Give An Overview of What You’ll Be Teaching.
Your first video (or videos) should provide the context of the course, and set clear learning expectations for what’s to come.
Describe what you’ll be teaching and how you’ll be teaching it, as well as including any technical information they’ll need to be aware of.
This might look like:
- A “Introduction to the Course” video.
- A “How to Navigate the Course” video.
You’ll also want to briefly explain the purpose of each step and module, and what people should take away from it.
2. Teach: Deliver Lessons in a Structured Format.
This is the main chunk of your course. It’s what your students signed up for!
Each of your videos should discuss one major topic (a skill, insight, etc.) that will help them get a better grasp on what they’re trying to learn.
Here’s a course outline example:
For a course on “How to Cook the World’s Best Burger,” you could break that down into the following videos:
- The equipment you’ll need to make your burger.
- Where to source the best ingredients.
- How to mix the burger filling and form your burger.
- How to create the perfect burger topping.
- Choosing the right condiments for your burger.
The way you segment your lessons, including topic and video length, will depend on your content and audience. You’re the expert, so you know what’s best to include!
💡 Pro Tip
When you’re outlining your content, it pays to know what learning environment your students will be watching your content in. This can help you create a much better experience!
For example:
Students following our “How to Cook the World’s Best Burger” will most likely be in the kitchen, following along as they go. This will have a direct impact on:
• Video length.
• Available equipment.
• The device they’ll be watching on.
So we can tailor the videos to best suit that experience. (Longer videos, lots of opportunities to pause and follow steps, etc.)
On the other hand, if you’re teaching people about Cryptocurrency they’ll be in a much different learning environment with different needs. (Shorter videos, lots of supporting resources.)
3. Recap: Explain the Final Takeaway.
To end each lesson, you should reiterate the main point and clarify once more the key points students should know when they’re done.
Restating the lesson-level objectives helps solidify the information for students.
You’ll also want a way for students to demonstrate that they’ve successfully absorbed the material – that’s where assessments come in.
You can include benchmarks like:
- Downloadable surveys, worksheets and quizzes.
- Asking students to submit their own video feedback.
These can serve as a progress marker for your learners and help them figure out what they want to focus on.
Video is versatile and can be adapted to any class format, so using the right structure to support your video lessons can definitely help your target audience learn more effectively.
4. Develop Your Cornerstone Content
By now, you should have a basic outline for your course, which means it’s time to create your content!
An engaging course can motivate your students – so let’s establish how you can capture their interest and create video content that they want to dive into.
Here are 3 tips for creating video lessons that resonate with students:
1. Create A Script and Storyboard.
To make sure you’re delivering lessons effectively, it helps to write a script and a storyboard (a graphic representation of your teaching outline) for each video.
Here’s a template we found on Creately that you can use:
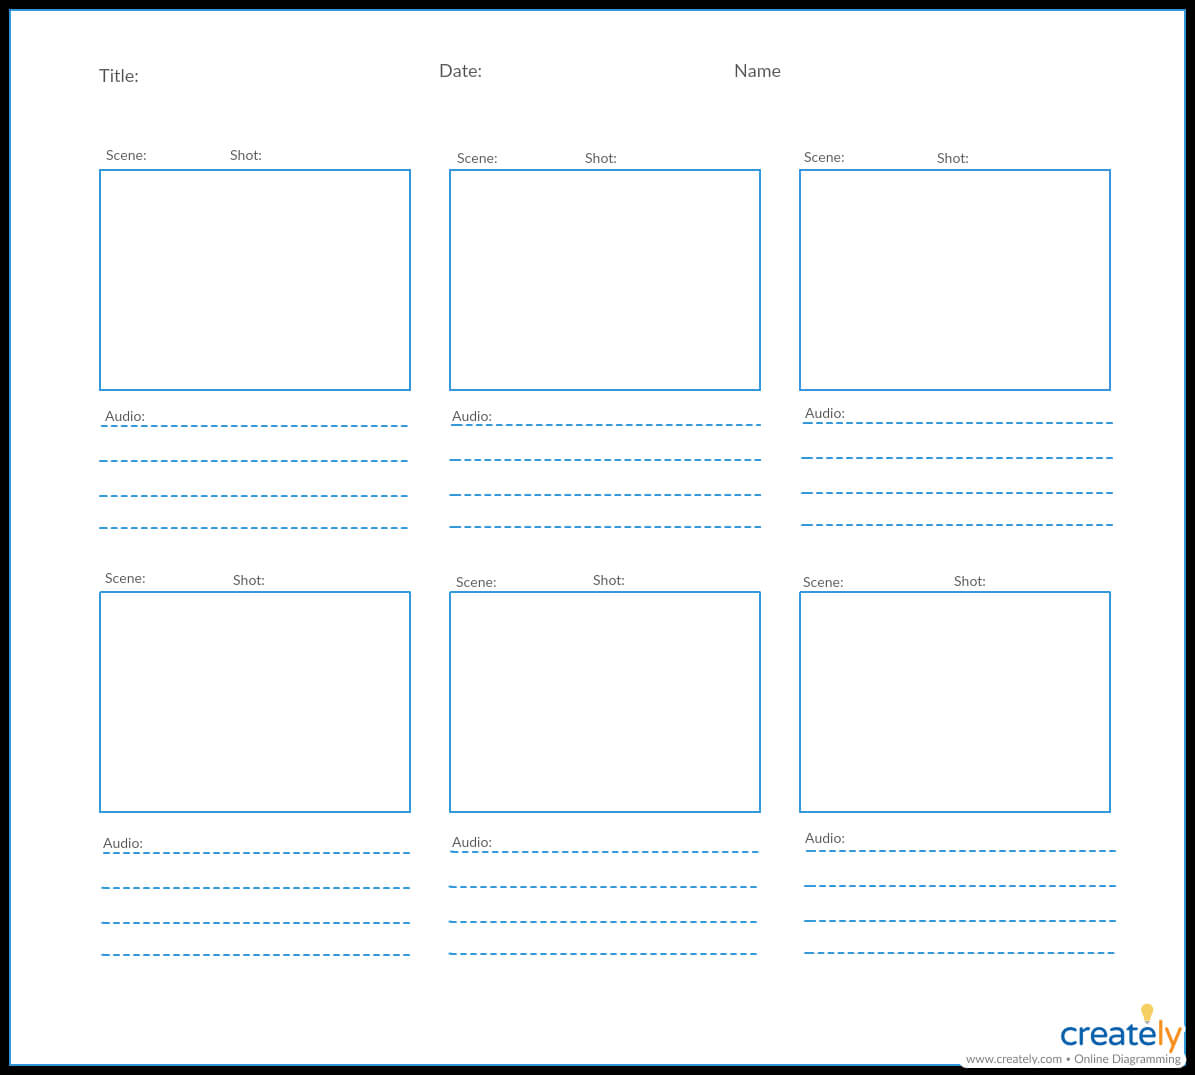
Remember your script and storyboard is just a guide. It’s okay to improvise and go off-script when you’re recording. In fact, this will keep your content authentic and relatable!
But to make your message clear and help your students gain a solid understanding of the material, creating a guided list of talking points before recording will definitely help.
2. Choose the Right Equipment.
The right equipment can be the difference between a good course and a great one.
Better still…
We live in an age where you can get high quality video equipment more affordably than ever. You just need a few good pieces that you know how to use.
Tony Gnau, Founder & Chief Storytelling Officer at T60 Productions, says:
Make sure you have the 3 most underrated pieces of video gear: microphone, light, and tripod. Anyone with a smartphone in their pocket has a good video camera, but if you can learn to use those 3 other tools effectively… you’re going to set your videos apart from everyone else.
Of course, you can upgrade your recording tools at any time, and we can help with that too! Check out our list of production tools for some awesome ideas:
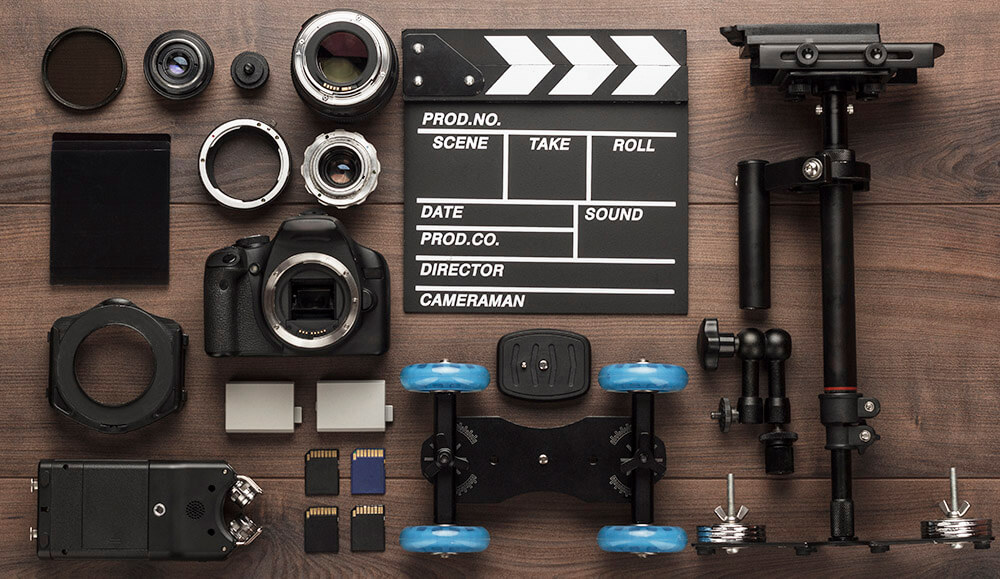

Video Production Equipment: Level Up Your Content With These 12 Tools
But to achieve professional-looking videos, it all comes down to mastering the equipment you have and your editing software.
Which leads us to…
3. Use An Engaging Editing Style.
While the educational content in your lesson is definitely important, you also need to make sure the video itself builds excitement!
And this can be simple as using the right editing techniques.
To break up your video, include visually appealing elements like:
- Graphic overlays.
- Visual highlights of your key points.
- Pattern interrupts (like switching camera angles, zoom shots, or B-roll footage.)
These will help keep the viewer from staring at one spot or speaker for too long (which can make it easy to lose focus.)
A great example of this comes from our own YouTube channel, where our great video editor Christine used engaging edits to turn a “talking heads” video into a really engaging clip!
For more technical tips and tricks, check out these recommended reads:
- The 9 Best Places to Find Free Music for Video Editing
- How to Combine Videos
- The Best Affordable Live Streaming Equipment
5. Upload and Organize Your Course Content
Presenting your course content in an intuitive catalog can have a great impact on the learning experience. The more easily students can navigate your course, the more likely they are to stick with your program.
We have a lot of experience with this here at Uscreen.
That’s why we offer the ability to customize learning paths for your courses by using categories, playlist collections, custom filters and tags.
Tint Yoga makes great use of these features by offering 8 different filters to search their library of yoga tutorials.
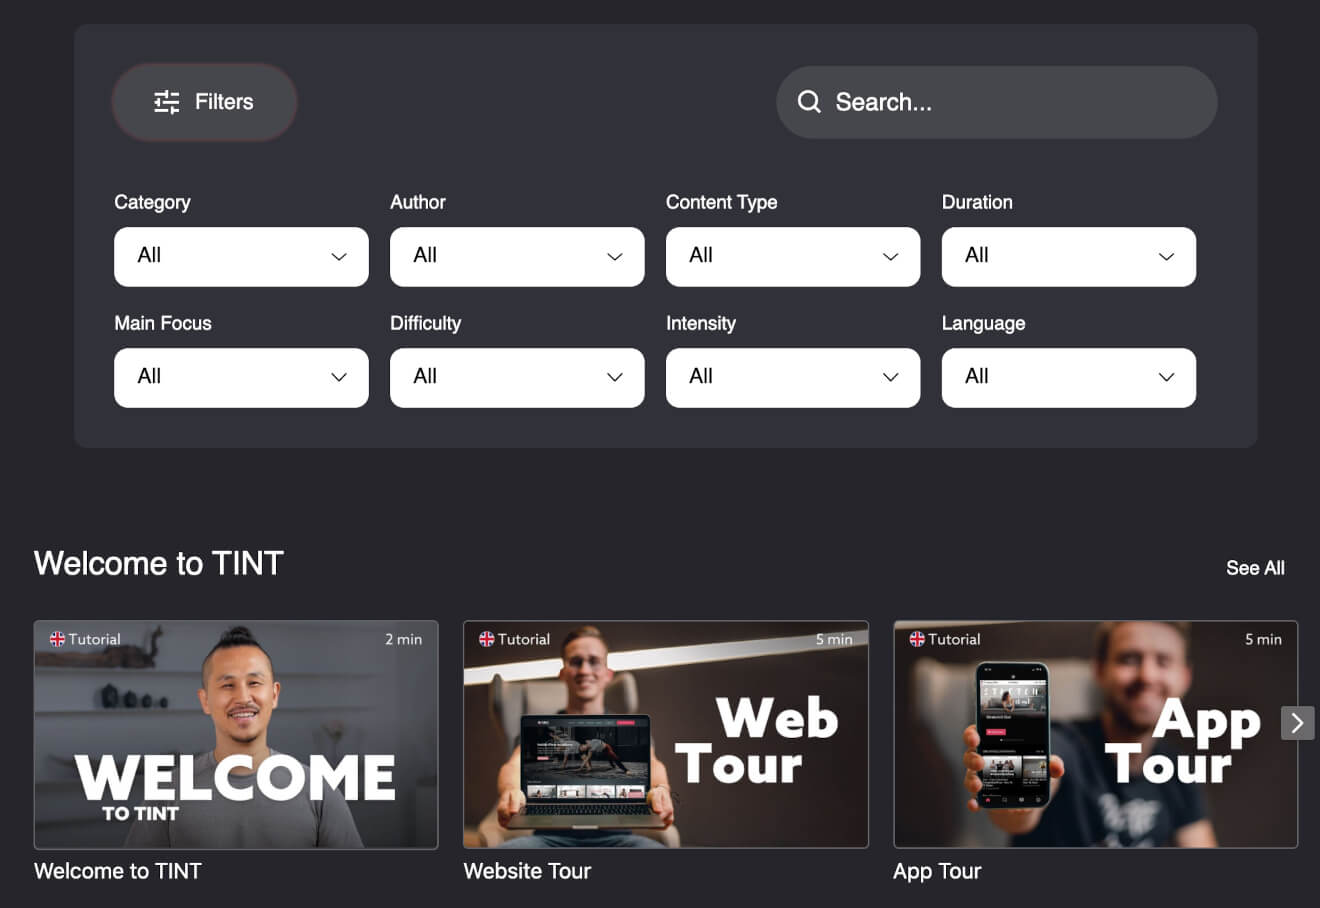
Using these instructional design features to organize your videos in a Netflix-style catalog can help students easily navigate the course and keep them on track.
When your coaching follows a clear course progression, they can easily see:
- What they’ve already learned.
- What they’re currently learning.
- How they can build on that knowledge to learn what comes next.
After helping students narrow down their online class search, Tint Yoga also groups content in collections that follow a linear learning path – like their “Beginner Advanced” series of 10 videos.
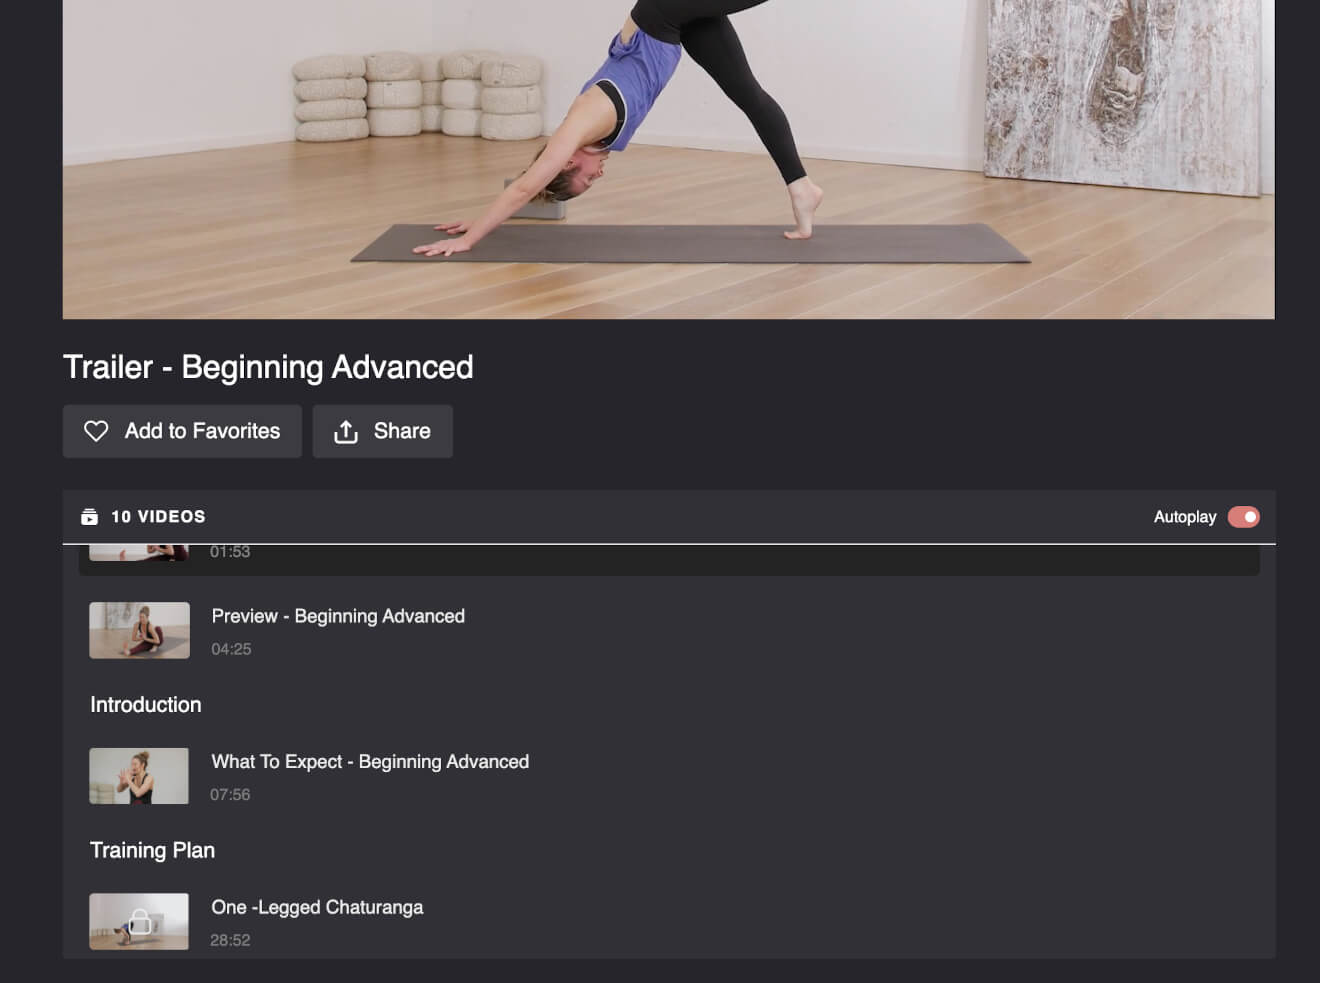
These organized groups help guide students from one level to the next.
In addition to using these tools, you can also set clear taglines and visually appealing thumbnails to make your course library even easier to navigate.
Being clear and logical in how you present course material will help students understand the point of each lesson.


Start your 14-day free trial today!
6. Add Extra Learning Resources
People join your program in order to achieve or accomplish something.
In order to do that, they need to put what they learn into practice. And providing hands-on projects within your course is a great way to help them to do that.
Uscreen lets you include downloadable resources and PDFs within your course and individual lessons.
These can include:
- Course action plan templates.
- Workbooks.
- Learning activities.
For example, Total Immersion Academy is a swim coaching course that offers e-books and swim image guides with every course purchase.
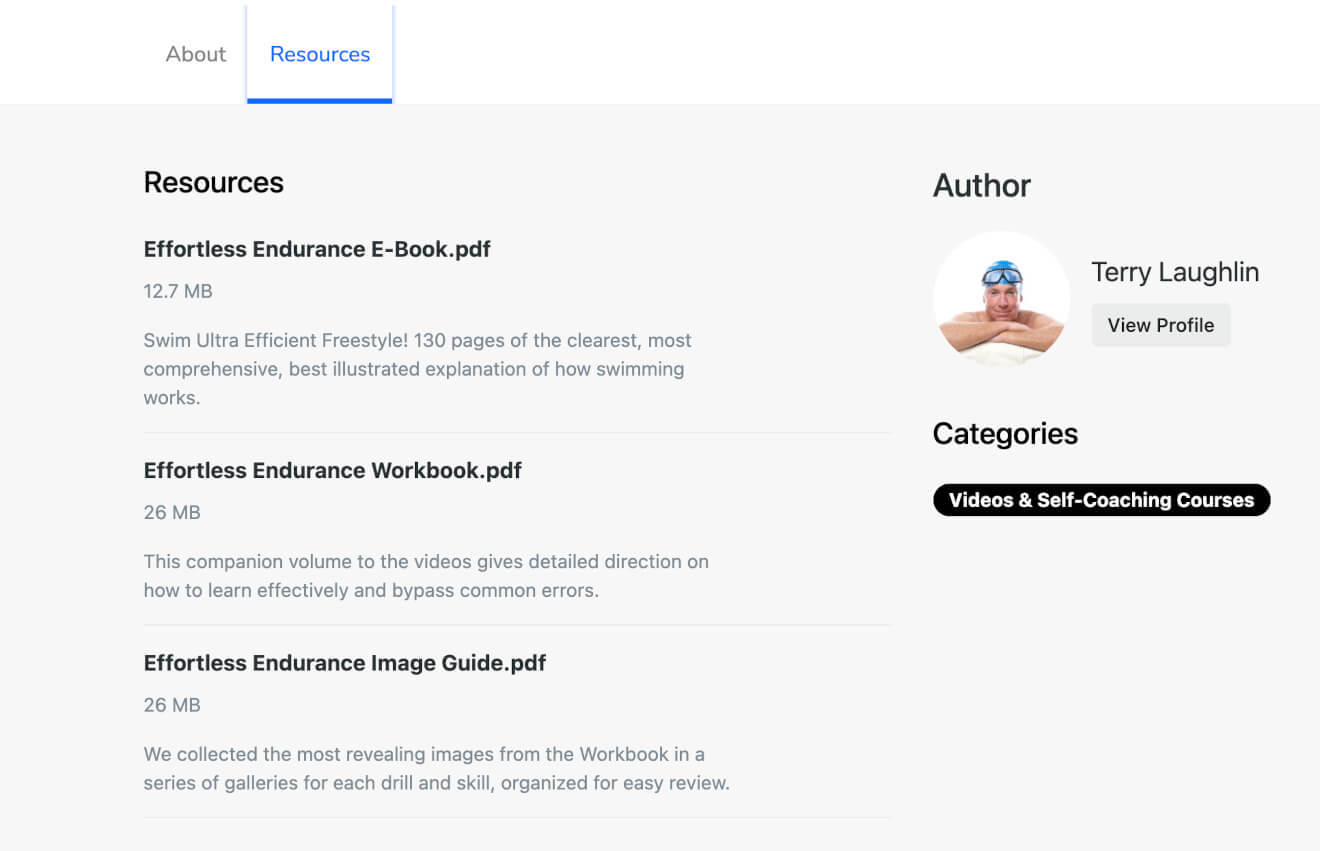
When students buy an individual course (or access to multiple courses with a subscription membership) they get a wide range of valuable extra resources to support their learning.
Not only does this help students succeed, it adds value to the course and makes customers feel like they’re getting their money’s worth.
7. Get Students Involved With Collaborative Features
Creating a community can help students stick to their purpose (and encourage deliberate practice) by getting them excited about your lessons.
Why?
Helping learners interact with you and each other creates a bond around shared learning goals.
So take advantage of every opportunity to connect with your students.
Here’s a few ways you can get people involved.
1. Social Learning Community
A proven way to improve your course is by including a social learning community. In fact, social learning increases course completions by 85%.
Students benefit more from their course experience when they can share it with other people.
Being part of a learning community allows them to:
- Bounce ideas off each other.
- Become learning resources for each other.
- Support each other’s goals.
You can start by creating an exclusive online community for your course. Take advantage of online spaces like Facebook groups and chat forums, like Formation Studio:
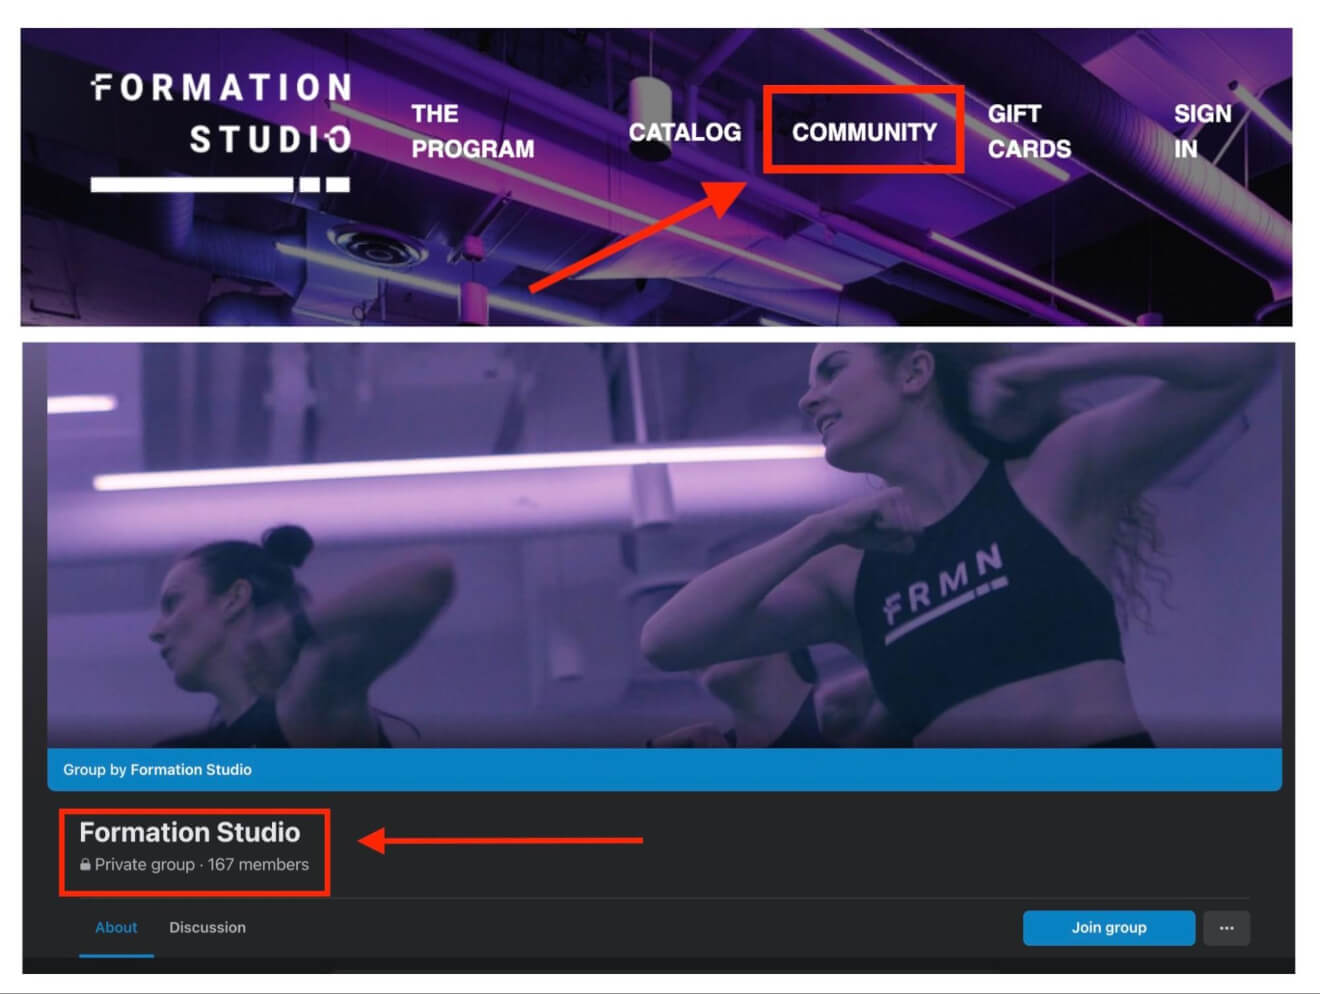
In your community, you can start discussions, ask students to reflect on their learning and even set learning challenges.
Take HarderClass:
When students finish this MasterClass, they can enter a contest and upload their own course project for the chance to win a collaboration with the celebrity instructors.

Encouraging students to share their knowledge is a great way to reward their efforts, increase motivation, and even provide inspiration for potential customers considering your course.
2. Live Webinars
Going live is a style of “synchronous learning,” which helps learners connect with you and other students.
Synchronous learning means bringing students together for real-time classes.
For example: teaching a lesson or holding a check-in session via live webinar once a week, where you and your students can all enjoy “face to face” interactions.
Offering a live option is always a great way to bring people together and give your students a way to touch base – but whatever level of live involvement you choose depends on your student demographic.
Remember: you can always make live classes optional or sell access to them as an add-on perk.
3. Email Involvement
Email helps you constantly stay in touch and keep students motivated.
61% of consumers enjoy receiving promotional emails every week, so it can be a great way to encourage them.
Uscreen’s Mailchimp integration and built-in email marketing tools can help you send course welcome and onboarding emails once someone registers for your course.
Then, you can continue to follow up with an email campaign that will help them further engage and excel, like:
- Course updates.
- Additional learning resources.
- Webinar invitations and reminders.
- Community discussions and challenges.
You can even send out automated reminders for lessons – email increases engagement and sometimes a friendly email is all it takes to help a student get back on track with their learning.
Optional: Supercharge Your Course Structure by Creating Apps
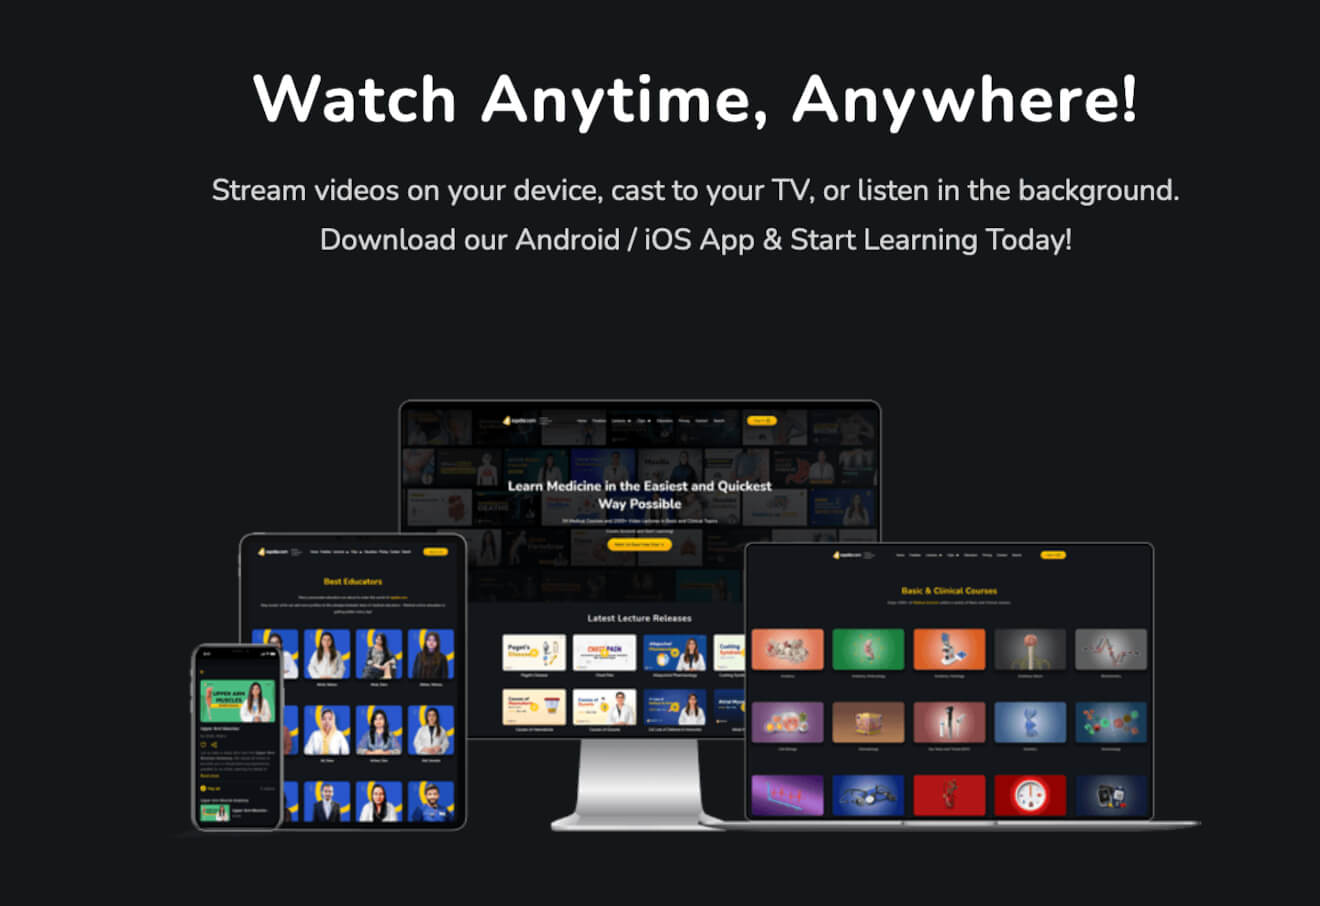
With apps, you can give students access to your course on multiple devices, so they can access your course anytime, anywhere.
Most students own multiple devices, and the ability to fit your course into their busy schedules by seamlessly switching from a computer to a phone, tablet or TV makes learning even more convenient.
In fact, the overall convenience of apps and mobile learning results in a 72% increase in user engagement.
For example: Sqadia, a business specializing in medical school online education, offers apps for Android and iOs systems to allow students more flexibility with their learning.
Plus, apps cater to the huge online trend of microlearning, which we mentioned earlier.
Elucidat.com reports that mobile devices work especially well with microlearning content (specifically, short 2 to 3 minute modules.)
People naturally have less time to devote to lessons when they’re on the go, but still want to squeeze some of your course in – and apps make that possible.
Uscreen can help you create apps that optimize your courses for any device. These apps support your entire course content library and even live streaming for live classes and coaching.
Build, launch and manage your membership, all in one place.
How Uscreen Can Help You Sell Courses Online
If you’re designing a course, you’re probably also looking for somewhere to host it.
You may have already read a few articles around the “best online course platform” and considered options like Thinkific, Kajabi and Teachable.
We also think you should check out Uscreen.
Though general course hosting platforms are great and have their place, you need a specialized platform – one that specializes in video hosting and video selling!
After all, videos are exactly what your course is made up of right?
You need a place that allows you to upload, share, and monetize your videos. And, we highly recommend you choose a provider that specializes in video websites and apps.
Uscreen is a great example of this:
We have everything you need to start, launch, and grow your online education business. With us, you can:
- Create your own course storefront.
- Upload and organize your videos with ease.
- Distribute your content with OTT apps on TV and mobile devices.
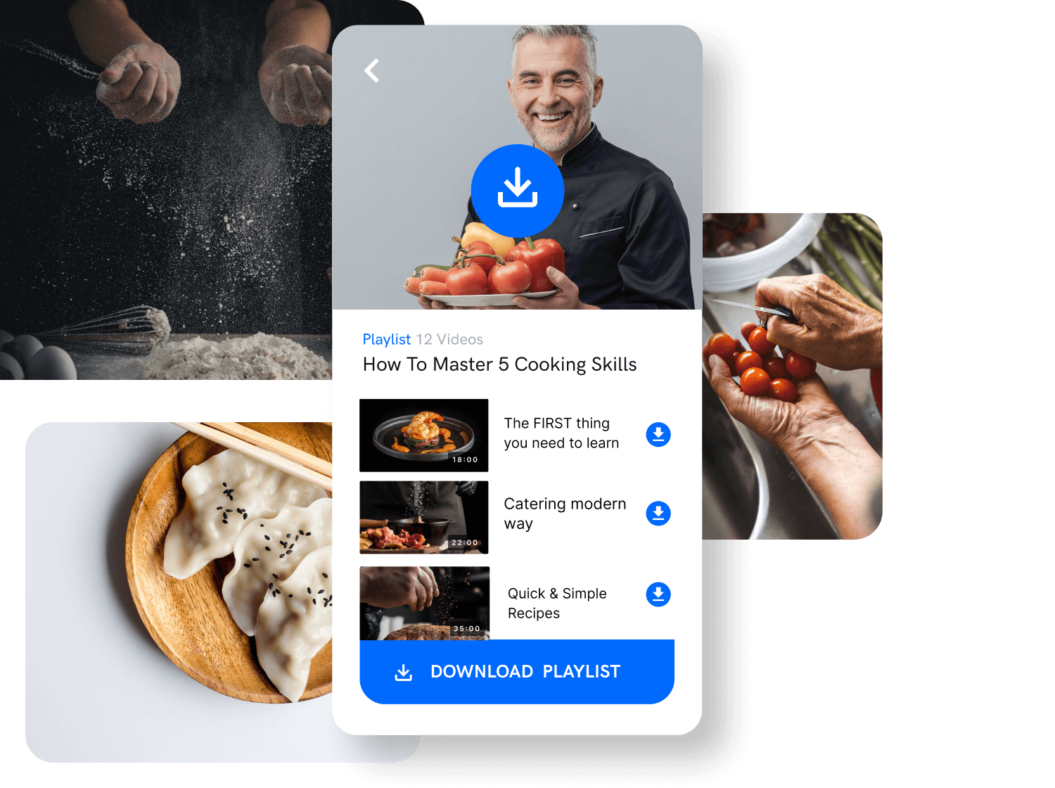
- Make your content downloadable to watch offline.
- Monetize your content, your way.
- Accept worldwide payments.
- Use live streaming to reach audiences on any device.
- Track subscriber growth and churn.
- Grow your sales with affiliate programs and referrals.
- Own your audience.
Better still…
We’re currently the number one platform in the video monetization industry and our customers earn an average of $12000+ a month!
You can start a free trial and learn more about how Uscreen can help you sell courses online by signing up through the link below:


Start your 14-day free trial today!
The Takeaway
We at Uscreen can confirm that developing your online course requires a game plan and some research. But we also know you can handle it – and the results will be worth it.
Seeing satisfied students (and repeat customers) means you’ve done your job well.
The best plan of action is to use these 7 steps to design a course that’s goal-oriented, social, and engaging.
That way, you can give people the opportunity to improve their lives with your course – while you transform yours by growing your online learning business.


