
The easy wins from a few years back are gone. Buyers got burned by courses that promised fast results and delivered thin, recycled content, so now they check reviews, look up who’s actually teaching, and want a clear curriculum before they pay.
And the market they’re shopping in keeps growing fast: Global Market Insights (opens in new tab) values the massive open online course (MOOC) market at $34.65 billion in 2025, projecting it to reach $990.54 billion by 2035, a 40.3% annual growth rate.
That’s not a shrinking pool of buyers. It means winning takes more than a bigger audience. You need to solve a specific problem and back it up with proof. That’s exactly why so many course sellers eventually (opens in new tab) grow into a membership model (opens in new tab) , since ongoing access, not a one-time sale, is what keeps people paying once the novelty wears off.
How to Sell Online Courses in 2026: TL;DR
| Step | What to do |
|---|---|
| 1. Define your audience | Find the one problem your most engaged followers keep asking about |
| 2. Validate your idea | Confirm demand with a beta sale, waitlist, workshop, or a few discovery calls before you build anything |
| 3. Choose your course format | Pick self-paced, cohort-based, live, or hybrid based on the time you can give each round |
| 4. Price your course | Set the price to the outcome, not a “safe” number, and offer more than one way to pay |
| 5. Pick a platform | Choose a platform built for how you’ll sell, since switching later means migrating videos, students, and payments |
| 6. Build a sales page | Answer what result they’ll get, who’s teaching, what’s included, the time needed, and the refund terms |
| 7. Launch and market | Run a real campaign across before-launch, launch week, and the first month, not one social post |
| 8. Keep students engaged | Track drop-off points, set small milestones, and follow up before someone cancels |
Step 1: Define your audience
Once you know people want this course, get specific about who it’s for.
Start with the people who already engage most often: repeat viewers, newsletter readers, community members, and previous customers. Review their questions and identify one problem that appears repeatedly. That problem is usually a stronger course starting point than a broad topic selected through keyword research alone.
A fitness coach might notice the same question appearing again and again ”How do I stay consistent while traveling?” That’s a strong course idea. That’s a course topic already validated by the audience asking for it.
Step 2: Validate your idea before you build anything
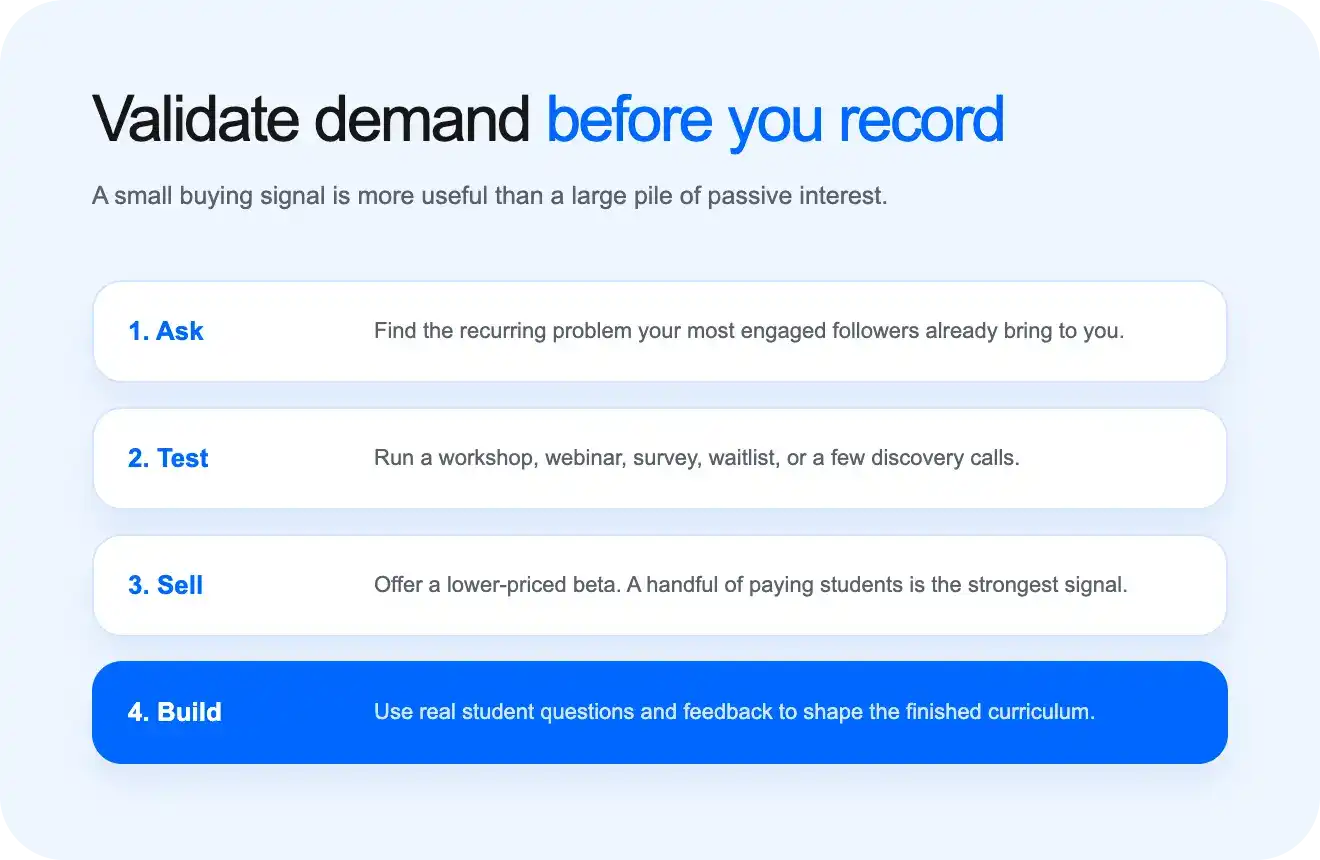
Most people skip this step. It’s also the one that causes the most wasted work. The biggest mistake is spending weeks recording a course, then finding out nobody wants it. You can avoid that almost entirely by checking demand first.
Here’s how:
- Sell a beta version at a lower price: A handful of people paying, even at a discount, tells you more than a hundred likes ever will.
- Run a free workshop or webinar: If people show up and stay engaged, that’s a strong signal.
- Ask your audience directly: Post a question or send a quick survey asking what they’re stuck on right now.
- Build a waitlist: Set up a simple page describing your course idea and see how many people sign up.
- Book a few discovery calls: Talk to five or ten people in your niche about the exact problem your course would solve.
These signals aren’t all equal. Comments and survey responses show interest. Waitlist sign-ups and workshop attendance show stronger buying intent. A beta purchase is the strongest signal. Someone has already paid before the finished course even exists.
A growing waitlist, engaged webinar attendees, or a handful of beta customers are all strong signs that you’re solving a real problem. If nobody bites, you’ve saved yourself weeks of building something people weren’t ready to buy.
Step 3: Choose your course format
Once you know your topic, decide how to teach it. Give it a title that says what someone will walk away with. “Urban Gardening Course” tells people nothing. “Grow a Thriving Garden in a Small Space” tells them exactly what they get. Keep the main title focused on the result. Move qualifiers like “for beginners” into the subtitle or supporting copy.
Break your lessons into small, connected steps. Keep each one short, around 10 to 15 minutes, so people can finish a lesson without losing focus.
Choose the format around what the student needs to do. Video works well for demonstrations. Templates, worksheets, and written guides are easier to reference later. Some topics work best as a mix of short videos and downloadable resources.
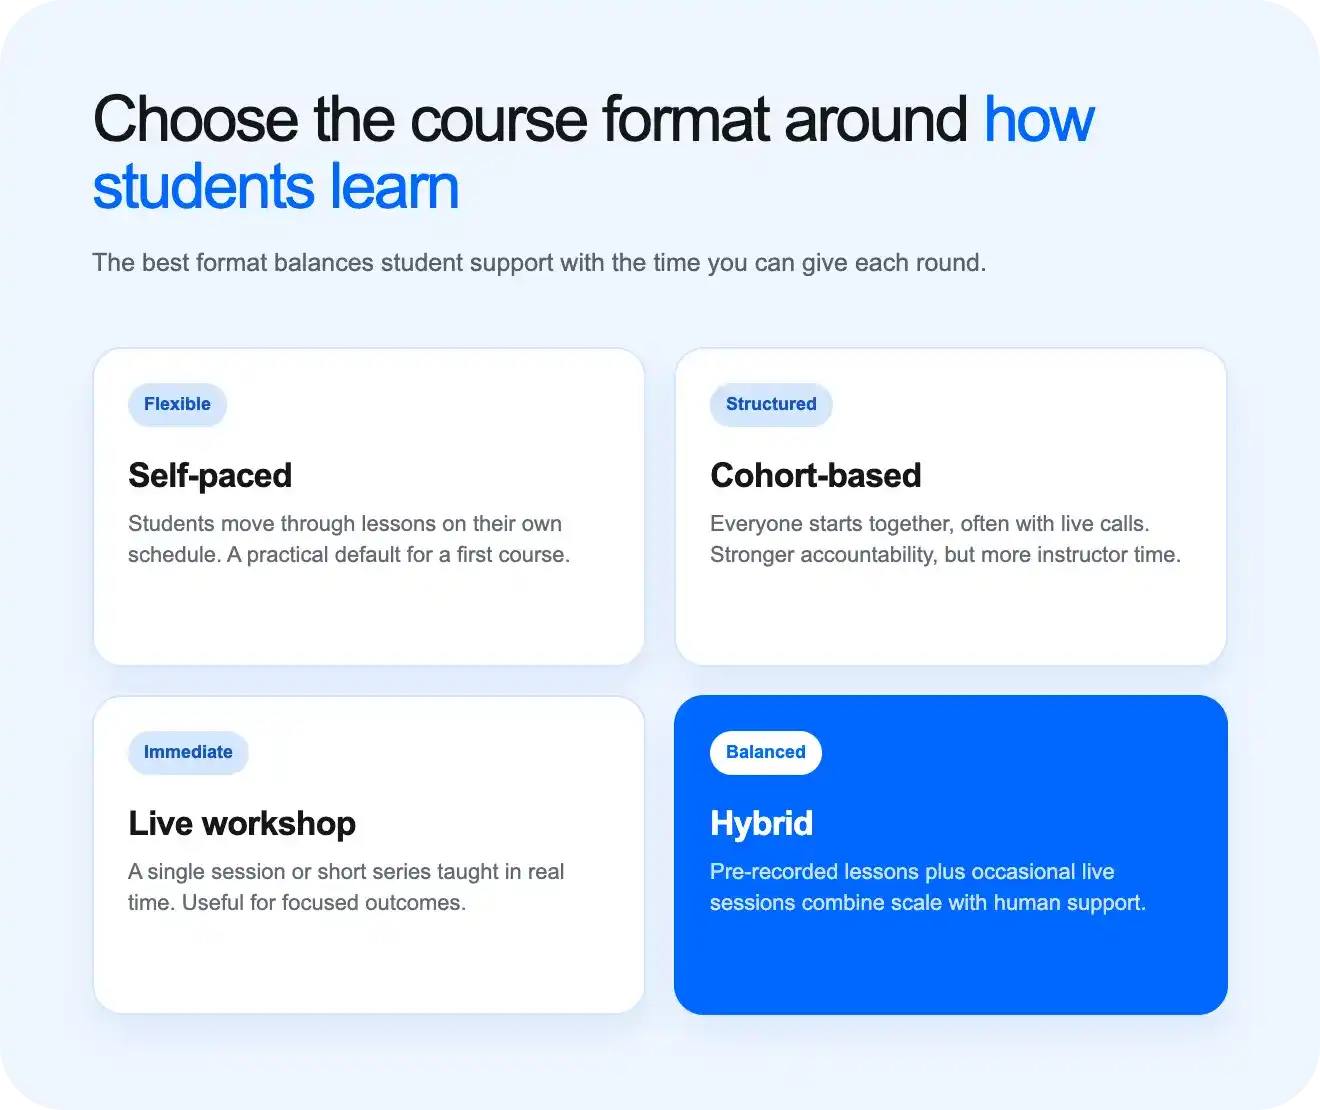
There’s more than one way to deliver a course, too:
- Self-paced courses let students move through lessons on their own schedule, which works well for most first courses.
- Cohort-based courses (opens in new tab) start on a fixed date and move everyone through together. They often include live calls, which can improve completion rates but require more of your time.
- Live workshops are a single session or short series taught in real time.
- Hybrid programs combine pre-recorded lessons with occasional live sessions. You get some of the structure of a cohort without running everything live.
Step 4: Price your course
Pricing a course (opens in new tab) is more than picking a number that feels safe.
Set the price around the value of the outcome
A course tied to a high-value outcome can justify a higher price. This includes courses that help someone change careers or grow a business. Price should reflect the result, the level of support, and the buyer’s alternatives.
For example, a low-support introductory course may be priced below a program that includes feedback, live sessions, or access to the instructor. The ranges will vary by audience, topic, and expected outcome.
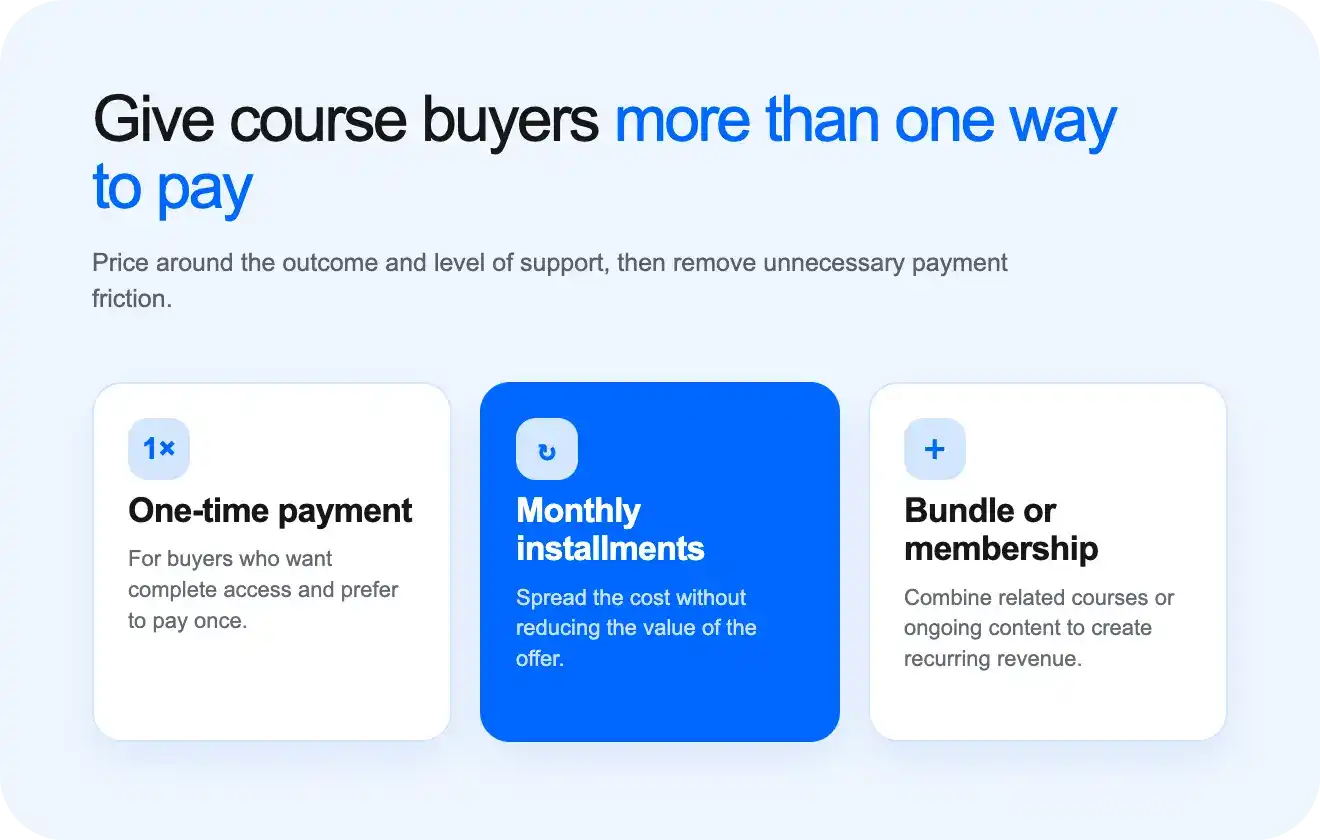
Give buyers more than one way to pay:
- A bundle, where two related courses sell together at a discount
- Monthly installments for people who’d rather spread out the cost
- A one-time payment for people who want to pay once and be done
Think beyond a single course
Consider pairing Course A with Course B as a bundle. You could also offer a membership that includes both, plus new content as you release it. This helps turn one-time course sales into recurring income. It creates steadier revenue over time.
Step 5: Pick a platform that fits how you sell
Switching platforms later often means (opens in new tab) migrating videos (opens in new tab) , students, payment data, and automations. That process can eat up weeks you’d rather spend teaching.
First, decide which kind of business you’re building. A standalone course usually needs structured lessons, assessments, certificates, and progress tracking. A broader video membership also needs recurring billing, community, live streaming, and app access. Making this decision first will narrow the platform list considerably.
Here’s why this matters: standalone courses cap out at a certain revenue ceiling per cohort. You’re dependent on launch cycles. Memberships, on the other hand, compound. Each new month of retention is revenue you didn’t have to earn twice. That’s the difference between unpredictable spikes and actual predictable business.
Look for a platform that includes:
- Analytics, so you’re not guessing at where students drop off instead of fixing the actual lesson that’s losing people.
- Reliable (opens in new tab) video hosting (opens in new tab) that works across desktop, mobile, and TV devices.
- Mobile apps (opens in new tab) that let students keep going during a commute or a workout instead of needing to sit at a laptop. That convenience turns an occasional viewer into someone who finishes the course.
- Email integrations, so reminders and win-back messages go out automatically instead of you tracking who needs a nudge by hand.
- Membership tools, if you plan to bundle courses into ongoing access.
- Community features (opens in new tab) , since students who can see and support each other are less likely to quietly disappear halfway through, when progress starts to feel social instead of solitary.
- Payments, including one-time purchases, payment plans, and subscriptions, so you’re not turning away a buyer who wanted to pay monthly instead of upfront.
- A smooth checkout, since a clunky payment page loses sales you already earned.
Step 6: Build a sales page that answers every question
A course description lists what’s included. A sales page answers the questions that stop someone from buying.
Start with the outcome. Tell people exactly what they’ll walk away with, then back it up with a section-by-section breakdown of the curriculum so they can see the path to get there. If you’re offering a money-back guarantee, say so clearly. It removes a lot of the hesitation that keeps people from clicking buy.
Be just as clear about who the course isn’t for as who it is. That might feel counterintuitive, but naming who won’t get value builds more trust than another glowing claim ever could. It tells the reader you’re not just trying to sell to everyone.
Answer the questions people usually ask before buying, and explain your own background: why you’re the right person to teach this. Include testimonials or results from real students, even if that’s just a handful of people from a small beta group. They answer the one question every buyer is silently asking: “Will this work for someone like me?”
Don’t bury the buy button once at the bottom of the page. Repeat it more than once so people can act the moment they’re convinced, instead of scrolling back to find it.
Bonus tip: Before you publish, ask whether the page answers what result you get, who’s teaching, what’s included, the time needed, and the refund terms.
Step 7: Launch and market your course
A great course with no one to see it won’t sell. Plan your launch as a short campaign. One social post is rarely enough.
| Stage | What to do |
|---|---|
| Before launch | • Build an email list, even before the course is finished • Publish free, useful content on your topic to warm people up • Share behind-the-scenes updates so people feel part of the process • Open a waitlist with an early-bird price for the first people who sign up |
| Launch week | • Share testimonials or results from your beta group • Offer a bonus that disappears once the cart closes • Email your list with a clear opening and closing date • Host a live Q&A or short webinar to answer questions in real time |
| First month | • Consider retargeting ads or an affiliate partnership once you have a proven offer • Post consistently on the social platforms where your audience already spends time • Run a short abandoned cart email sequence (opens in new tab) for anyone who visited checkout but didn’t complete payment • Publish videos and blog content optimized for search, so new people keep finding you • Set up a referral program, where a happy student gets something free for bringing a friend |
Step 8: Keep students engaged and reduce cancellations
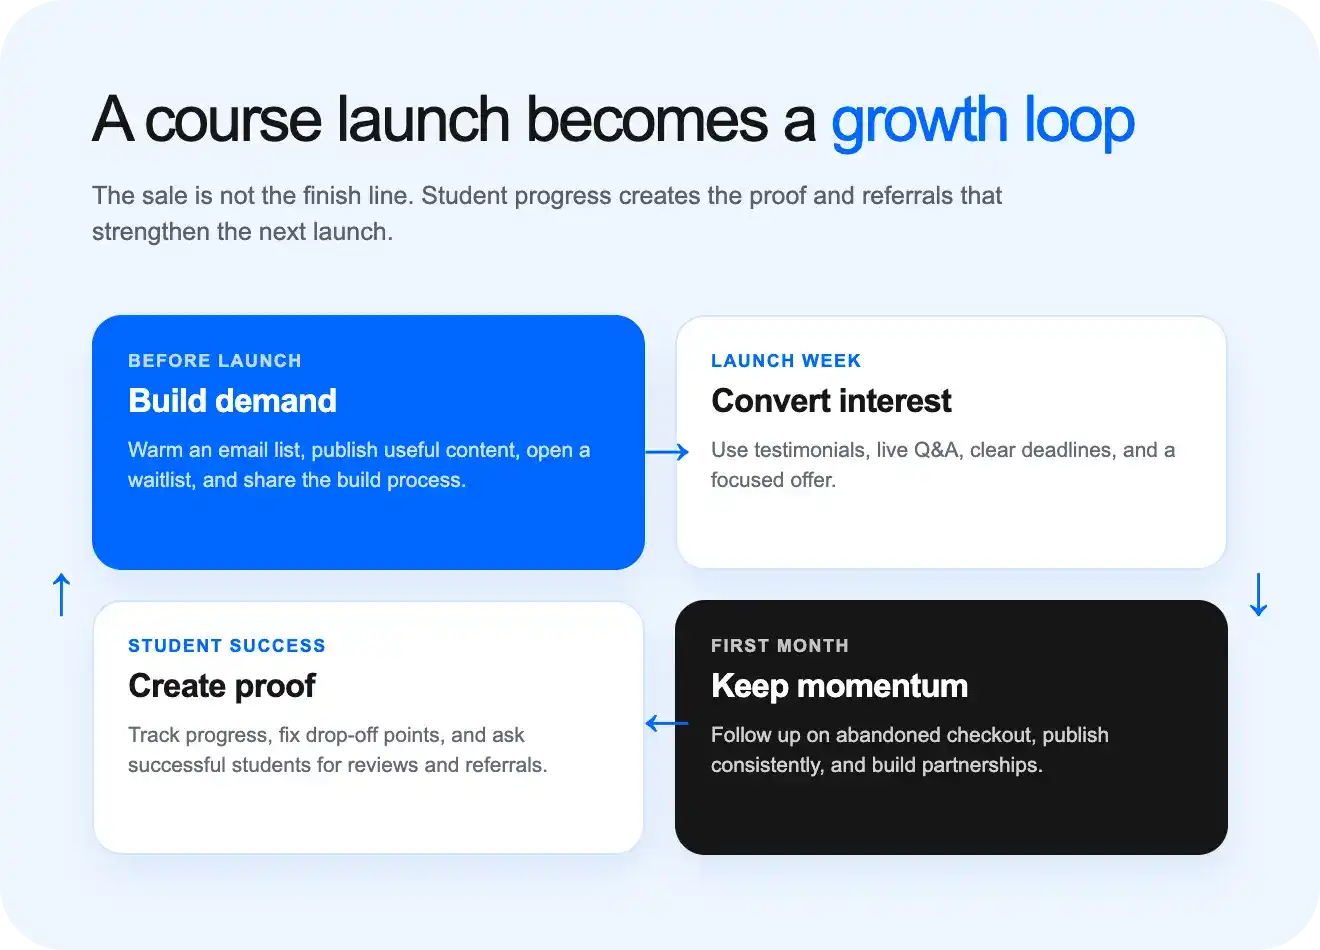
Student engagement deserves as much attention as the initial sale. Keeping people engaged after they buy helps you build a real business. It also leads to more reviews, referrals, and stronger future launches. Most cancellations happen because students stop making progress, not because they dislike the content.
- Host a live session to walk through common sticking points
- Check in with students partway through and ask how it’s going
- Set small milestones so progress feels visible, not overwhelming
- Build a space, even a simple one, for students to support each other
Track where students stop progressing. A sharp drop after one lesson usually points to a problem. The assignment may be confusing, the video may be too long, or a resource may be missing. Fixing that section may improve completion more than adding new content.
You can also define an early activation milestone.
For example, this could be completing the first lesson, posting an introduction, or downloading the first worksheet. Students who don’t reach that milestone should receive a reminder. You can also send a personal support message.
When someone cancels, use the opportunity to understand why they left. Send a short cancellation survey before starting a win-back sequence. Some students may have left because of time, cost, or a technical issue. Use their answer to offer relevant help, a pause option, or a reminder later.
Students who finish the course have experienced the complete result you promised. They are also the best people to approach for reviews, referrals, and feedback. Higher completion rates can produce stronger testimonials, more referrals, and more repeat purchases. Every finished course also builds trust for your next launch.
Common mistakes new course sellers make
A lot of course launches fail for the same handful of reasons, and most of them come from a simple misunderstanding:
| Mistake | Why it happens | What to do instead |
|---|---|---|
| Recording every lesson before validating demand | It feels like more production means a better shot at selling | Sell a beta first and let real student feedback shape the final course |
| Making videos too long | It feels thorough to cover everything in one sitting | Cap lessons around 10 to 15 minutes so students can finish one without losing focus |
| Underpricing out of self-doubt | A low price feels like the safer, less risky ask | Price to the outcome you deliver, since a low price can also read as low value |
| Trying to teach everything in one course | A broader course feels like it reaches more buyers | Solve one clear problem well, since specificity is what makes a course stand out |
| Ignoring marketing until launch day | Course creation feels like the “real” work, so marketing gets pushed later | Build an email list and share useful content before the course is even finished |
| Skipping testimonials | Early on, there’s no proof yet to feature | Collect them from your beta group, even a handful of real results is more convincing than none |
| Focusing only on getting the sale | The purchase feels like the finish line | Treat student success after the sale as the real goal, since that’s what drives referrals and your next launch |
Choose the right platform for your business model
Not every course business needs the same kind of platform, so it’s worth being honest about where you fit before you build.
| If You Want | Consider |
|---|---|
| A simple, standalone course with no frills | Teachable (opens in new tab) |
| Deep course customization and formal learning features like SCORM | Thinkific (opens in new tab) |
| An all-in-one system for courses, email marketing, and funnels | Kajabi (opens in new tab) |
| Memberships, community, live streaming, and branded mobile & TV apps around your course | Uscreen (opens in new tab) |
This guide focuses on the fourth path: building a course that grows into something bigger than one launch. If that’s the direction you’re headed, the platform choice matters more than it might seem right now. Moving students, payment data, and content to a new platform later can turn into a real project of its own.
Is Uscreen the right platform for your course?
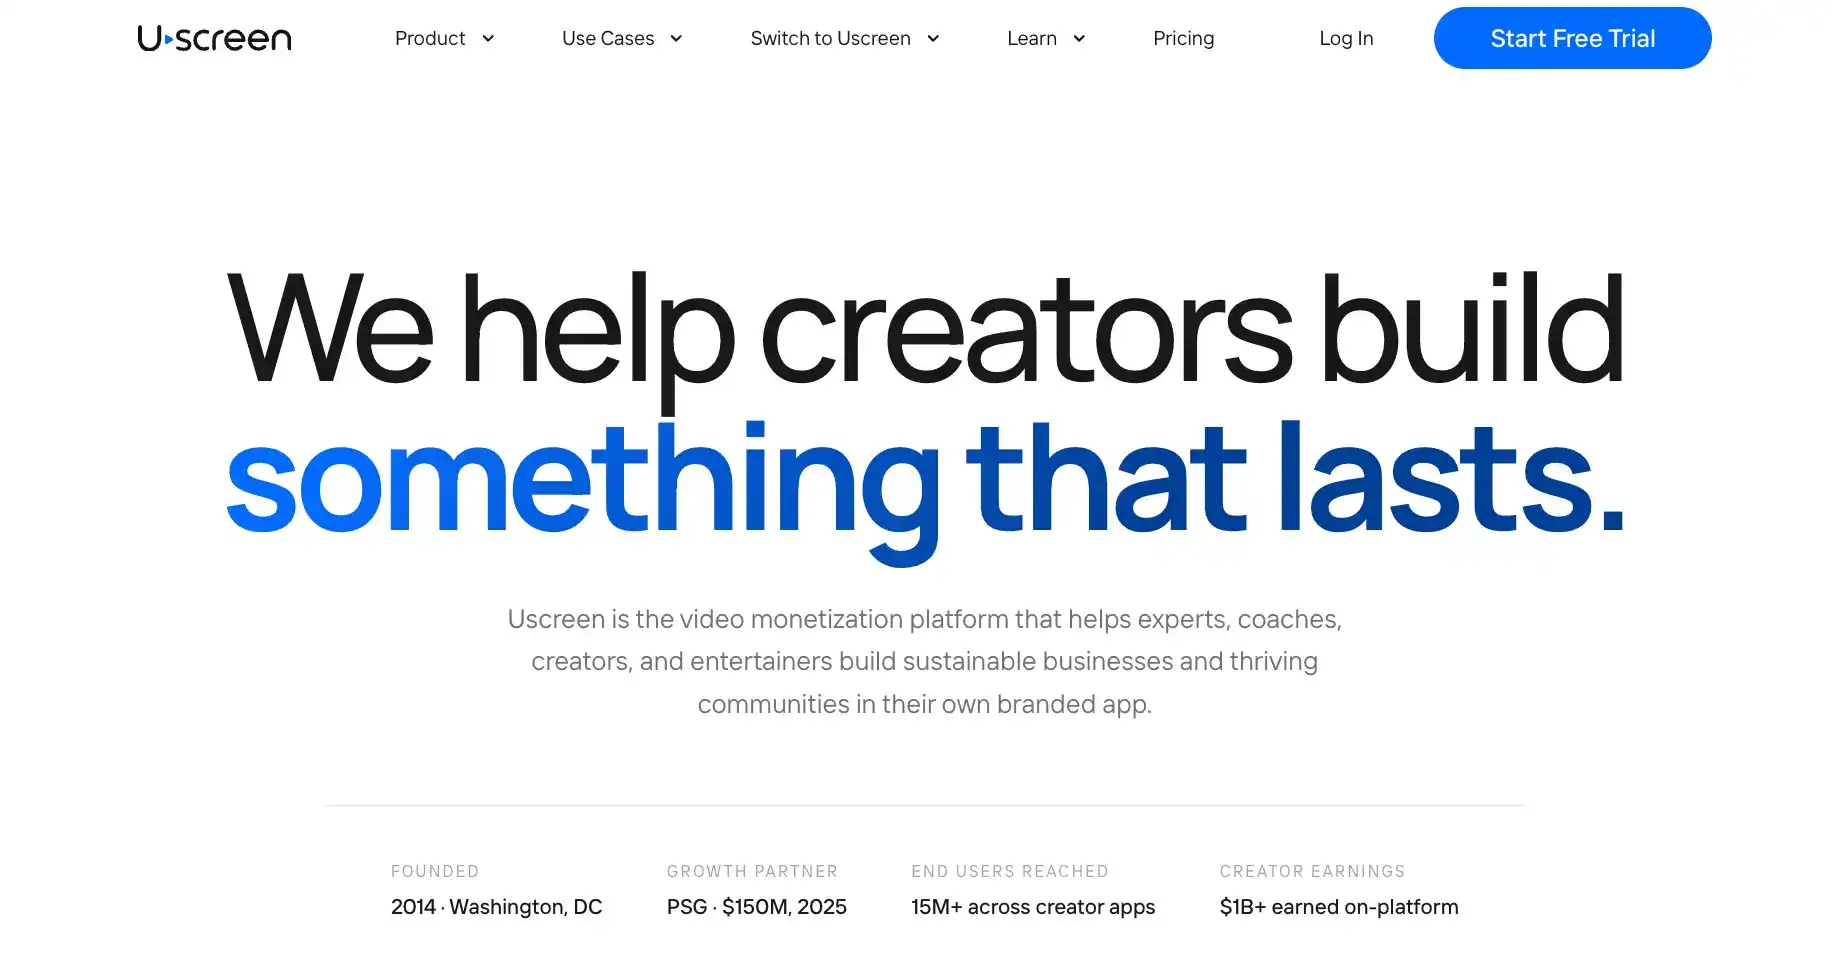
Uscreen is the right platform if you want your course to grow into a full membership business, not stay a one-time sale. It bundles memberships, live streaming, community, and branded mobile and TV apps into one platform, so you’re not stitching together five separate tools as you scale.
The platform backs that up with real numbers.
Over 4,000 video businesses run on Uscreen, generating more than $1 billion in cumulative subscription revenue, including $210M+ in 2025 alone.
If you’re switching from another platform, Uscreen’s migrations team has handled more than 1,000 moves, usually in 30 to 60 days, and most of your subscribers only need to reset a password. If ongoing access and community are where you’re headed, explore Uscreen’s (opens in new tab) pricing (opens in new tab) , membership tools (opens in new tab) , and App Builder (opens in new tab) to see if it fits.