It’s now 2018 and being a video content creator is considered a legit career. And why not, the choice to move to your own VOD platform provides more creative control and stability while earning more from doing what you love.
But as you surely know, building a strong following on YouTube is one thing, while monetizing it is a different matter altogether. And with YouTube’s unpredictable update schedule, the issues get compounded even more.
To make your videos stand out and rake in those views, go the extra mile and make professionally-made VODs. Not sure where to start? Here are six video editing hacks that give an extra layer of polish and professionalism to your videos:
1. Create an outline for your edits

Editing videos can be a daunting process. Don’t be surprised if it takes a significant chunk of your day to trim something that’s less than five minutes long! So before starting the actual editing work, create an outline or storyboard first and imagine the finished product.
Take a look at the footage you’ve collected so far and clearly mark which piece of footage should go where. Be sure to include the key message of each segment. This way, you can start planning the appropriate effects that would go best with that section. Also note timestamps, such as how long each piece of key footage is and where you can trim it down.
This outline seems like an extra step but has been proven to be worth doing. Its main benefit is the reduced time spent in back-and-forth referencing during your editing.
2. Set the mood
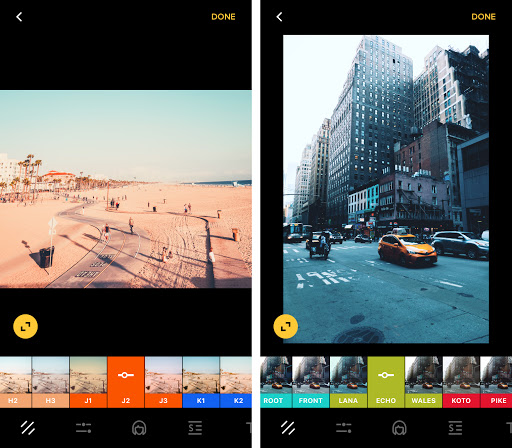
Different colors evoke different moods, so use them to influence your audience’s reactions and emotions. During color grading, use warm colors to give off a cozy or romantic mood and cooler colors to add a sophisticated atmosphere.
If you’re using your phone to make videos, try a mobile video editing app that comes ready with pre-made color overlays for a quick, easy, and professional results.
3. Add context, use text
Is text in a video a good idea when users retain more information with visuals and sound? The short answer is yes. Consider activating subtitles to assist viewers who are hard of hearing or those who prefer to watch videos on mute.
Not convinced? Subtitles or closed captioning also increase the number of time viewers spend on your video by a whopping 40%. Audiences are also more likely to watch videos all the way to the end than if subtitles weren’t present.
But you’re not limited to just subtitles when manipulating text on your video. As an added effect, try superimposing text straight into the visuals when you want to emphasize certain keywords. It helps make your point visually and makes it more memorable too.
4. Use the right kind of cuts
We’ve all seen sloppily-edited videos with awkward scene transition effects. We want to avoid this at all costs! It’s critical that transitions are not only smooth and visually appealing but also serve the overall story that you’re trying to tell.
One of the most popular transition styles is the jump cut. This is used to cut out sections of footage that are unnecessary or have errors to “skip” them. Jump cuts also give a dramatic forward-in-time effect.
The problems with this are its abrupt nature and popularity in informal vlogs. Simply said, using jump cuts can erode the professional look that you want. Instead, try the cut-and-zoom method where the next piece of footage starts zoomed in. Practically speaking, this eliminates the impression that someone edited the video due to errors.
There are more than just two editing styles that you can use. Experiment with different types of transitions to find the one that’s most compelling for your video!
5. Add music and sound effects
Similar to color grading, having appropriate music and sound effects at particular moments helps sets the tone and mood of your work. But be careful about copyrights. To avoid issues, use royalty-free music and sound effects that you can find online.
You’ll actually be amazed by the available music that’s completely free to use. Once you’re sure it’s free to use, just download the files and plot them on your storyboard.
One more quick tip about music and sound effects: don’t forget the bigger picture. Choosing upbeat music in a scene painted in somber colors causes dissonance and confuses viewers.
6. Create Custom Thumbnails
Thumbnails matter, but please, ditch the clickbait. We’ve all been the victims of the tactic too many times before. Maybe you yourself indulged in this on other platforms. But in your YouTube channel, your users already like you enough to hit subscribe, so be confident that they’re already interested in what you’re offering!
That being said, the right YouTube thumbnail does wonder for showing what your video is about at a glance. It also sets the viewers’ expectations about the content that you’re about to deliver.
Instead of using just any scene in your video, use it as a base for a bit of creativity. If you appear in your own videos, grab a high-resolution shot of yourself in a dynamic pose (obviously a picture of you just standing around doesn’t convey the same energy). Clear the background or add some simple visual elements to make it more interesting like borders or shapes.
But of all the elements of a killer thumbnail, the most important one is the addition of large text in an easy-to-read font. You can achieve professional results in a matter of seconds using a photo editing app. As for what’s written, the go-to solution is your video’s actual title or a similar word related to your content as a hook.
Ready to begin? Never underestimate the power of good editing—it’s what makes your channel worth watching.